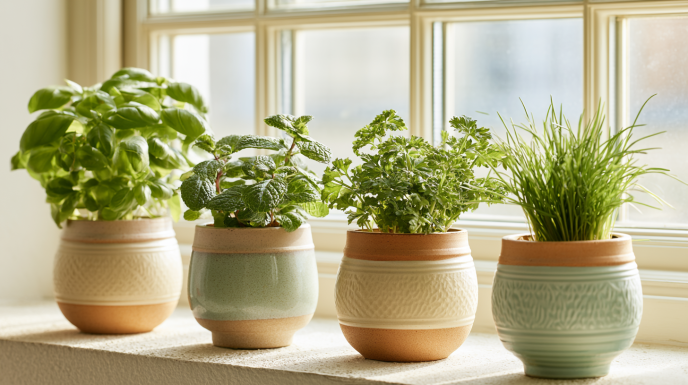
How to Start an Indoor Herb Garden: A Complete Guide
This post contains affiliate links. As an Amazon Associate we earn from qualifying purchases, at no extra cost to you.
There’s something deeply satisfying about reaching into a pot on your windowsill, snipping a handful of fresh basil, and adding it straight to your plate. An indoor herb garden gives you that — fresh flavour at your fingertips, year-round, without any outdoor space. It’s one of the easiest, most rewarding things you can grow, and it genuinely doesn’t take much to get started. Here’s the complete beginner’s guide.
Why Grow Herbs Indoors?
The economics alone make it worthwhile. A small bunch of fresh basil from a supermarket costs $2–$3 and wilts in a few days. A pot of living basil costs the same, but if you look after it, it will give you harvests for months. Fresh herbs from the garden also taste meaningfully better than packaged ones — more fragrant, more vibrant, and actually alive when they hit your dish. Beyond cooking, herbs smell wonderful, look great on a windowsill, and add a little life and green to a kitchen that might otherwise have none.
The Best Herbs to Grow Indoors
Some herbs are far better suited to indoor growing than others. These are the most reliable:
- Basil: The most rewarding kitchen herb to grow. Loves warmth and sun. Pinch flower buds off as they appear to keep the plant productive. Grows quickly and smells incredible.
- Mint: Almost impossible to kill. Very vigorous — always give it its own pot or it will crowd out everything else. Great for tea, cocktails, and desserts.
- Chives: Compact, fast-regrowing, and useful. Snip from the top and they regrow within days. Good in low-light conditions.
- Parsley: Steady and reliable. Takes slightly longer to establish but then produces generously. Tolerates moderate light.
- Thyme: A hardy Mediterranean herb that actually prefers slightly drier conditions and tolerates periods of neglect. Perfect for busy beginners.
- Oregano: Similar to thyme — drought-tolerant, easy, and useful in cooking. Grows bushy and low-maintenance.
- Rosemary: Needs good light and good drainage. Slower to grow than the others but long-lived and aromatic. Worth the patience.
If you’re starting out, basil, chives, and mint are the easiest trio to begin with — fast-growing, useful in cooking, and forgiving of the occasional forgotten watering.
What You’ll Need to Get Started
The good news is that the equipment list is short and inexpensive:
- Pots with drainage holes: Essential — herbs sitting in waterlogged soil will rot quickly. 4–6 inch pots are ideal for most herbs; mint benefits from a larger 8-inch pot.
- Saucers: To protect your windowsill and catch drainage water.
- Quality potting mix: A standard multipurpose compost or herb potting mix works well. Don’t use garden soil — it compacts in pots and drains poorly.
- Seeds or starter plants: Starter plants from a garden centre or supermarket are quicker to harvest. Seeds are cheaper but take longer. For beginners, starter plants are more satisfying.
- A watering can with a narrow spout: Helpful for watering precisely without drenching leaves.
Optional but genuinely useful: a small grow light. If your kitchen doesn’t have a south- or west-facing window, a cheap clip-on grow light will make a significant difference to your herbs’ health and productivity.
Light — The Most Important Factor
Most culinary herbs need 6+ hours of direct sunlight per day to thrive. A south- or west-facing windowsill is ideal. East-facing windows provide gentler morning light, which works for parsley, chives, and mint but may make basil and rosemary leggy and weak. North-facing windows are difficult for most herbs without supplemental light. If you have limited natural light, a small full-spectrum LED grow light positioned 4–6 inches above the plants and run for 12–14 hours per day will produce results as good as — sometimes better than — a sunny window.
Planting Step by Step
1. Choose your pot. Make sure it has drainage holes. If you’re using a decorative pot without holes, use it as a cachepot (a cover) and put your actual plant in a plain pot with drainage inside it.
2. Fill with potting mix. Fill to about an inch below the rim.
3. Plant your herb. For starter plants, gently tease the roots apart if they’re compacted, sit the plant in at the same depth it was in its original pot, and firm the soil around it.
4. Water gently. Water until it drains from the bottom, then let the top inch of soil dry before watering again.
5. Position in light. Place on your sunniest windowsill, rotating the pot every few days so all sides get even light.
Watering and Feeding
Overwatering is by far the most common mistake with indoor herbs. Most herbs prefer to dry out slightly between waterings — they’re Mediterranean plants that are adapted to warm, dry summers. The rule of thumb: water when the top inch of soil feels dry. Water thoroughly until it drains from the bottom, then stop. Empty the saucer after 30 minutes so the pot isn’t sitting in water.
Feed with a diluted liquid fertiliser every 2–3 weeks during the growing season (spring and summer). In winter, herbs slow down and need less feeding. A tomato or herb-specific liquid feed works well.
Harvesting — Do It Often
Regular harvesting is what keeps herb plants healthy and productive. For basil, pinch stems just above a pair of leaves — the plant responds by branching and producing more growth. For chives, snip from the top, leaving at least 2 inches of growth. For mint, harvest stems from the top. Never remove more than a third of the plant at once, and always harvest from the top rather than stripping lower leaves.
Pinch off any flower buds as soon as they appear on basil and mint — once a plant flowers, it redirects all its energy into seed production and the leaves become smaller and less flavourful.
Your Kitchen Garden Starts Today
An indoor herb garden is one of the simplest, most rewarding things you can add to your home. Start with two or three herbs you actually cook with, give them a sunny spot and consistent watering, and harvest from them regularly. Within a few weeks you’ll have fresh herbs on demand — and once you see how easy it is, adding more is irresistible.

WOW