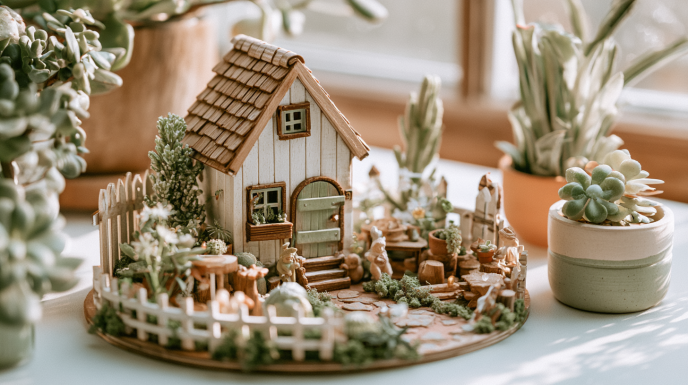
How to Make a Teacup Fairy Garden: A Tiny Magical Project for Any Small Space
There is something irresistible about a garden small enough to hold in your hands. A teacup fairy garden takes the whole magical world of miniature gardening and shrinks it into a single delicate cup, making it the ultimate project for anyone who is short on space but big on imagination. It costs almost nothing, takes an afternoon at most, and turns a forgotten piece of china into a tiny living scene you’ll want to display on a windowsill for everyone to admire.
If you have ever wanted to try miniature gardening but felt daunted by the idea of a full beginner’s fairy garden, a teacup version is the perfect place to start. It’s forgiving, quick, and endlessly charming.
Why a teacup makes the perfect fairy garden
A teacup fairy garden works because its size does half the design work for you. In a tiny cup, every element feels intentional, and even one small plant plus a single figurine reads as a complete little world. The curved sides and pretty patterns of vintage china frame the scene beautifully, and the saucer gives you a natural base to extend the garden or catch stray water.
Best of all, a teacup garden lives happily indoors. There’s no need for a balcony, a yard, or even a sunny patio. A bright windowsill is all it takes, which makes this an ideal project for apartment dwellers, students in dorm rooms, or anyone who wants a touch of green on a shelf.
What you’ll need
Part of the joy of this project is that you probably have most of it already. Gather a teacup, ideally one with a matching saucer, an old vintage cup with a chip or a charity-shop find works wonderfully. You’ll also want a small bag of potting mix, a few tiny plants, and some decorative touches like fine gravel, moss, or pebbles.
For the fairy details, look for the smallest accessories you can find: a miniature door, a tiny bench, a fairy figurine, or a little sign. If you enjoy making things, you can craft these from twigs, pebbles, and clay, much like a broken pot fairy garden uses natural materials. A few tiny stones can become a path, and a scrap of moss makes an instant lawn.
Choosing the right miniature plants
The secret to a teacup garden that lasts is picking plants that genuinely stay small and cope with shallow soil. Slow-growing succulents are the easiest choice, since they need little water and thrive in tight quarters. Baby succulents, sometimes sold as “mini” plants, are perfectly scaled for a cup.
If you prefer a lush, green look, tiny mosses and small ferns give that classic enchanted-forest feel, though they’ll want more frequent misting. Other good options include baby’s tears, dwarf mondo grass, and small sedums. For more ideas on what thrives at this scale, our guide to the best miniature plants for tiny fairy gardens covers the most reliable choices. Whatever you pick, keep it to one or two plants so the cup doesn’t become crowded.
Step by step: planting your teacup fairy garden
Step one: prepare the cup. Because a teacup has no drainage hole, you’ll need to manage water carefully. Add a thin layer of fine gravel or a few small pebbles to the bottom to create a reservoir where excess water can collect away from the roots. If your cup is large enough, a pinch of activated charcoal on top of the gravel helps keep the soil fresh.
Step two: add soil. Spoon in your potting mix until the cup is about two-thirds full. Use a cactus or succulent mix if you’re planting succulents, as it drains faster and protects against rot. Press the soil down gently to remove air pockets.
Step three: plant. Make a small hollow with your finger or a spoon, settle your plant in, and firm the soil around its roots. Keep the plant slightly below the rim so there’s room for your decorative touches.
Step four: decorate. This is the fun part. Lay a path of tiny pebbles, tuck in a patch of moss for a lawn, and position your fairy door against the side of the cup as though it leads into a secret home. Add your figurine, a miniature bench, or a tiny sign, and step back to admire the scene. A single well-placed accessory often looks more magical than a dozen crammed together.
Caring for your tiny garden
The biggest risk to a teacup garden is overwatering, precisely because there’s no drainage hole. Water sparingly, adding just a spoonful or two at a time and checking that the soil dries between drinks. For succulents, let the mix dry out almost completely before watering again. For mossy gardens, a light mist every few days keeps things fresh.
Place the cup where it gets bright, indirect light. A south or east-facing windowsill is usually ideal. Turn the cup every week or so, since plants lean toward the light and you’ll want your little scene to grow evenly. Trim any growth that starts to overwhelm the cup, and refresh the moss if it browns.
Fun ways to make it your own
Once you’ve made one teacup fairy garden, it’s hard to stop. Try a themed cup, perhaps a seaside scene with tiny shells and blue gravel, or a woodland glade with acorns and a mushroom or two. A cluster of three teacups on a shelf, each with its own little story, makes a gorgeous display. Children love helping to arrange the accessories, and a finished cup makes a heartfelt, handmade gift.
You can also swap the accessories with the seasons, adding a tiny snowman in winter or a little bunting for a birthday. If you catch the miniature-gardening bug, browse our roundup of the best miniature garden accessories to bring even more personality to your tiny scenes.
A whole garden in the palm of your hand
A teacup fairy garden proves that you don’t need land, a green thumb, or a big budget to grow something enchanting. With a pretty cup, a scoop of soil, and a little imagination, you can create a complete miniature world that brings a smile every time you pass it. It’s the smallest of gardens and one of the most rewarding, a reminder that big beauty really does fit into the tiniest of spaces.