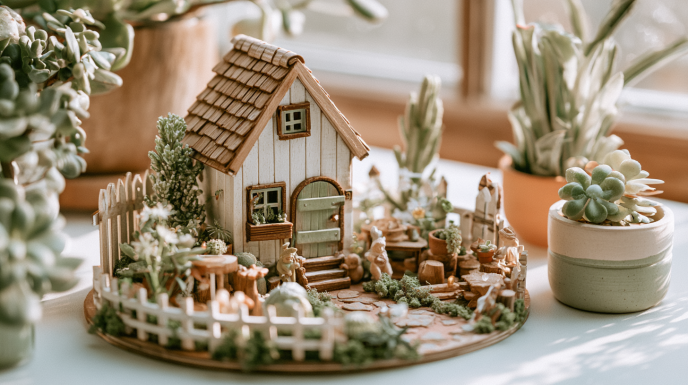
Fairy Garden Pathways and Bridges: Tiny Details That Make a Miniature Garden Magical
Every good fairy garden needs somewhere for its tiny residents to go. A cluster of miniature plants and a little house is charming, but it’s the path winding between them — the pebble trail leading to a mossy door, the little bridge arching over a “stream” of blue glass beads — that makes a scene feel lived-in. Pathways and bridges are some of the cheapest, easiest upgrades you can make to a fairy garden, and they’re often what turns a nice miniature planting into one people can’t stop looking at.
If you already have a fairy garden going, or you’re just starting with a beginner’s fairy garden build, this is the next layer of detail worth adding. Here’s how to plan, build, and place paths and bridges that actually look believable at a tiny scale.
Why Pathways Matter More Than You’d Think
A path does two jobs in a miniature garden. Practically, it guides the eye through the scene — from the entrance, past the plants, to the focal point, whether that’s a fairy house, a pond, or a bench. Visually, it breaks up green space and adds contrast, texture, and a sense of scale that plants alone can’t provide.
Without a path, a fairy garden can start to look like a random cluster of small objects. With one, even a handful of accessories reads as a coherent little world.
Materials That Work at a Tiny Scale
The trick with fairy garden paths is choosing materials small enough to feel in-proportion. A few reliable options:
Aquarium gravel or pea gravel: Sold in tiny sizes at pet and craft stores, this is the most popular path material because it’s cheap, comes in natural colors, and can simply be poured and shaped by hand.
Flat pebbles or slate chips: For a “stepping stone” look, small flat stones placed individually create a more deliberate, walked path rather than a solid trail.
Sand: Fine sand makes a smooth, pale path that contrasts nicely against moss and dark soil, especially for a beach-adjacent or desert-themed miniature scene.
Crushed brick or terracotta: Broken pieces of an old terracotta pot, crushed small, give a warm reddish path that pairs well with cottage-style fairy houses — a nice way to reuse material if you’ve ever built a broken pot fairy garden.
Wood slices or bark: Thin cross-sections of twigs, laid flat, make excellent stepping-stones for a woodland-themed garden.
Laying a Path Step by Step
Start by deciding where the path needs to go before you place any plants. It’s much easier to build around a path than to squeeze one in later.
Lightly press a shallow trench into the soil with your finger or a small stick, just deep enough to hold your material in place. Fill it with your chosen gravel, sand, or stones, tamping it down gently so it doesn’t scatter. For a curved or winding path, work in short sections rather than trying to lay the whole thing at once — it’s easier to keep the curve looking natural.
If you’re using stepping stones, space them slightly unevenly rather than in a perfectly straight line. Real paths wander a little, and that small imperfection is what sells the illusion at miniature scale.
Building a Simple Bridge
A bridge is really only needed if there’s something to cross — a dry creek bed made of blue glass beads, a mirror “pond,” or simply a gap between two planting beds. But even a small decorative bridge over nothing in particular can work as a charming focal point.
The simplest bridge is two popsicle sticks or thin twigs laid as rails, with smaller twigs glued crosswise as the deck. Craft stores also sell pre-made miniature wooden bridges cheaply, which is the fastest option if you’d rather skip the building step. For a stone bridge, a single flat rock laid across a narrow gap does the job with zero construction required.
Whichever version you choose, anchor it gently into the soil on both ends so it doesn’t shift when you water nearby plants.
Pairing Paths With the Rest of the Scene
A path works best when it has an obvious start and end point. Lead it from the “entrance” of the garden — often the front corner of a container — toward a fairy house, a bench, or a cluster of miniature plants that acts as the visual anchor.
Keep the path narrow relative to the planting beds around it — usually no more than an inch wide in a small container. A path that’s too wide will dominate the scene and shrink everything else by comparison.
If your fairy garden lives outdoors, choose path materials that won’t wash away in rain. Gravel and stone hold up far better than sand or bark over a season.
A Small Detail With a Big Payoff
Pathways and bridges take very little time to add, but they’re often the detail that makes visitors lean in for a closer look. Once the bones are in place, it’s easy to keep refining — a tiny signpost at a fork in the path, a scattering of moss along the edges, or a miniature lantern to mark the way. It’s this kind of layering, one small addition at a time, that turns a simple planted container into a scene people want to sit with.