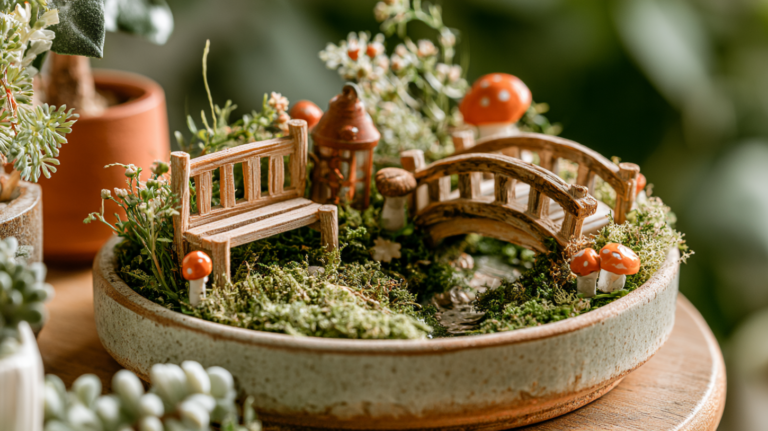
How to Make a Tree Stump Fairy Garden: A Magical Miniature World From an Old Log
If you’ve ever had a tree removed and been left staring at the stump, or found a hollow log while tidying the garden, you’re holding the perfect canvas for one of the most charming projects in miniature gardening. A tree stump fairy garden turns an awkward leftover into a raised, eye-level enchanted world, complete with tiny plants, a little path, and a fairy house or two.
Because the stump is already elevated, this kind of fairy garden shows off beautifully and saves your back from constant bending. It’s an ideal weekend project for a small garden, and it’s a wonderful one to build with children. Here’s how to create your own.
Why a Tree Stump Makes a Perfect Fairy Garden
A stump or log has a natural, woodland character that’s already halfway to magical. Its rough bark, rings, and knots look like something a fairy might genuinely call home, so your miniature world feels believable from the start.
Raising the display off the ground has practical benefits too. It sits at a height where you can admire the details, it’s harder for slugs and pets to disturb, and it draws the eye to a spot in the garden that was previously just an obstacle. In a small space especially, turning a problem stump into a feature is a satisfying way to reclaim every corner. If you’re new to the craft, our beginner’s guide to making a fairy garden covers the basics that apply here too.
What You’ll Need
Gather your materials before you begin so the build flows smoothly:
A tree stump or thick log, ideally one that’s begun to soften or already has a hollow. A drill or chisel to create or enlarge a planting cavity. Small stones or broken pottery for drainage. A free-draining potting mix. A handful of miniature plants. And your decorations: a fairy house, tiny furniture, pebbles for paths, moss, and any little figures you love.
If your stump is solid and healthy, you can still build on it by attaching a shallow container or hollowing out a pocket, though a partly rotted stump is far easier to work with.
Step 1: Prepare the Stump
Start by hollowing out a planting cavity in the top of the stump. If the wood is already soft or hollow, you may be able to scoop it out with a hand trowel or chisel. For firmer wood, drill a ring of holes and then knock out the middle with a chisel and mallet.
Aim for a cavity a few inches deep, big enough to hold soil and small roots. Then drill two or three drainage holes through the base or sides of the cavity so water can escape, since even fairies don’t like waterlogged feet. Brush out the loose debris when you’re done.
Step 2: Add Drainage and Soil
Place a thin layer of small stones or broken pottery in the bottom of the cavity to keep the drainage holes clear. Then fill with a free-draining potting mix, pressing it in gently and stopping about half an inch below the rim so it won’t wash out when you water.
If the cavity is shallow, choose plants with correspondingly small root systems, which brings us to the fun part.
Step 3: Choose and Plant Your Miniatures
The best plants for a stump fairy garden are naturally small, slow-growing, and happy in a snug root space. Mosses are perfect for carpeting the surface with lush green, while tiny succulents, baby’s tears, dwarf ferns, and small alpines all suit the woodland scale.
Plant the largest miniature first to anchor the design, then tuck smaller plants and moss around it. Leave a little open ground for your path and buildings. For a fuller list of what thrives at this tiny scale, see our roundup of the best miniature plants for tiny fairy gardens.
Water lightly once everything is in place to settle the roots.
Step 4: Build the Fairy World
Now for the magic. This is where a plain planted stump becomes an enchanted scene. Set your fairy house on a level spot, then create a little path leading to its door using fine gravel, pebbles, or tiny sliced-log stepping stones.
Add miniature furniture, a bench, a tiny table, a ladder climbing the bark, and a few figures or animals. A curl of moss can become a lawn, a bottle cap a pond, and a twig an archway. The natural ridges and hollows of the stump are gifts here: a knot becomes a doorway, a split in the bark becomes a staircase. Let the wood’s character guide where each element goes.
If you’d like to make some of the pieces yourself, our guide to DIY fairy houses from natural materials shows how to craft charming buildings for free.
Step 5: Finishing Touches and Placement
Stand back and look at your scene, then adjust. A few well-placed details, a scattering of tiny pinecones, a fairy peeking from behind a plant, a miniature lantern, do more than a cluttered jumble. Restraint keeps the world feeling believable.
Position the finished stump where it gets the light your plants need, usually a spot with morning sun and afternoon shade suits mosses and ferns best, while succulents want brighter conditions. Somewhere you pass often is ideal, so the little world greets you daily.
Caring for Your Stump Fairy Garden
Miniature gardens are low-maintenance but not no-maintenance. Water when the soil feels dry, taking care not to flood the shallow cavity. Trim back any plant that starts to outgrow the scale and threatens to swallow the buildings.
Over time the stump will continue to weather and slowly decompose, which only adds to its woodland charm, though it does mean this is a project with a natural lifespan of a few years. Refresh the moss and plants each spring, and move any frost-tender figures or delicate pieces indoors over winter.
A Feature Worth Keeping
A tree stump fairy garden is proof that the best garden features often come from working with what you already have. Instead of grinding out that stubborn stump, you can crown it with a tiny, magical world that delights everyone who spots it. It costs very little, uses materials you can gather from around the garden, and turns an eyesore into the most enchanting corner of your small space. Grab a chisel and a handful of moss this weekend, and let the fairies move in.