DIY Vertical Garden Wall: Materials, Steps, and Cost
This post contains affiliate links. As an Amazon Associate we earn from qualifying purchases, at no extra cost to you.
A living green wall is one of the most dramatic transformations you can make to a small outdoor space — and you don’t need to spend hundreds on a ready-made system to get one. With a weekend afternoon and a handful of materials, you can build a DIY vertical garden wall that turns a plain fence, balcony wall, or bare patio corner into something genuinely beautiful. Here’s everything you need to know, from materials to costs to long-term care.
Why Build a Vertical Garden Wall?
Vertical gardens solve the small-space gardener’s biggest problem: there’s simply no room to spread out. A green wall lets you grow upward instead of outward, adding privacy, beauty, and living greenery without using a single square foot of floor space. It also acts as a natural screen from neighbors, softens hard surfaces like brick or concrete, and can even help insulate a wall slightly in warmer months. And unlike a trellis with one or two climbing plants, a full vertical garden wall creates an immediate, lush visual impact that looks like it took years to achieve.
Choosing Your Base
The base is what holds your plants, soil, and structure together, and there are several good options depending on your space and budget.
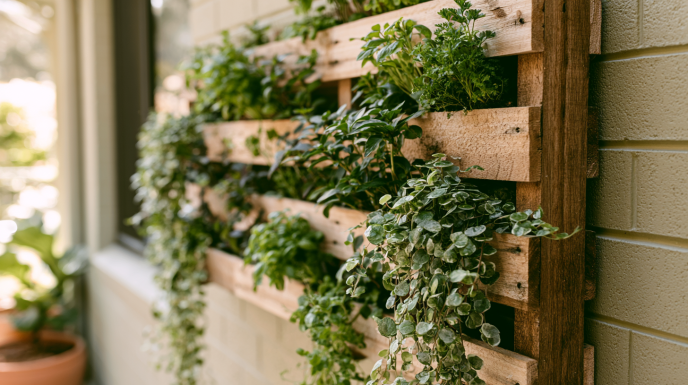
- Wooden pallet: Free or very cheap, sturdy, and gives a rustic look. Best for fences and ground-level walls.
- Fabric pocket planter: Lightweight and easy to hang anywhere. Great for balconies and rental spaces where you can’t drill into walls.
- Modular wall panels: More expensive but very tidy-looking. Each panel holds individual pots that can be rearranged or swapped out.
- PVC pipe system: A DIY option where you drill holes into lengths of pipe and fill them with soil. Inexpensive and surprisingly effective.
For most beginners, a fabric pocket planter is the easiest starting point. They’re ready to hang straight out of the box, require no construction, and can be moved if you change your mind.
Materials You’ll Need
- Your chosen base (pallet, pocket planter, or modular system)
- Landscape fabric and staple gun (if using a pallet)
- Quality potting mix — not garden soil, which compacts and drains poorly in vertical setups
- Plants suited to your light conditions
- Sturdy wall brackets, screws, or heavy-duty hooks rated for wet soil weight
- A watering can or drip irrigation line
What It Costs
A DIY vertical garden is one of the most budget-friendly garden projects you can take on. Here’s a rough breakdown:
- Pallet: Free from local businesses, or $10–$20 if purchased
- Fabric pocket planter: $15–$40 depending on size
- Potting mix: $10–$20 for a large bag
- Plants: $3–$10 each; herbs and succulents tend to be cheapest
- Hardware (brackets, screws): $5–$15
Most people build a complete small vertical garden wall for $40–$80. If you source a free pallet and grow from cuttings or seed, you can get it under $30.
Best Plants for a Vertical Garden
Not every plant thrives in a vertical setting. The best choices are compact, don’t need deep root space, and can handle slightly drier conditions between waterings.
- Herbs: Basil, parsley, mint, thyme, and chives all do well and give you something to harvest.
- Succulents: Drought-tolerant, slow-growing, and striking. Ideal for sunny walls.
- Trailing flowers: Petunias, lobelia, and nasturtiums add color and cascade beautifully over pockets.
- Ferns and ivy: Great for shaded walls and north-facing balconies.
- Lettuce and leafy greens: Surprisingly well-suited to vertical growing and fast to harvest.
Step-by-Step Build
1. Prepare your base. If using a pallet, sand down any rough edges and staple landscape fabric to the back and sides to create a soil pocket. If using a fabric planter, simply unroll and hang it.
2. Secure it to the wall. Use brackets or hooks rated well above the weight of wet, plant-filled soil — this can be heavier than you expect. For pallet walls, two or three sturdy L-brackets work well.
3. Fill with potting mix. Pack soil firmly into the pockets or pallet gaps. Leave a little room at the top of each pocket for watering.
4. Plant from the bottom up. Start at the bottom so soil doesn’t fall onto plants you’ve already placed. Put sun-lovers at the top and shade-tolerant plants lower if your wall gets uneven light.
5. Water gently to settle the soil and help roots make contact. Expect some settling in the first week.
Keeping It Healthy
Vertical gardens dry out faster than pots on the ground because the soil volume is smaller and air circulates around all sides. Check moisture levels every one to two days in warm weather, and water until you see it draining from the base of the pockets. A simple drip irrigation line or self-watering pocket system makes this much easier and keeps watering even across the whole wall. Feed with a liquid fertilizer every two weeks during the growing season, and trim plants regularly to keep the wall full and balanced — a few bare pockets can make the whole thing look neglected.
Your Living Wall Awaits
A DIY vertical garden wall is one of the most satisfying projects you can make for a small outdoor or indoor space. It’s affordable, relatively quick to build, and the results are instant and striking. Start with a simple fabric pocket planter if you’re new to this — hang it, fill it, plant it, and you’ll have a living wall in an afternoon. From there, it only grows more beautiful.